
Today I want to share a project that is solving three problems for me: 1) Too many odd balls of string around the house, 2) nothing to do with one’s hands during long commutes or short vacations, and 3) too many ill-fitting but otherwise beloved souvenir t-shirts cluttering up the dresser. I’ve never felt able to rock the cut up t-shirt look, but unisex tees turn me into a shapeless, albeit petite, blob.
I love to crochet and crocheting lace is a favorite travel project because cotton thread is inexpensive and easy to pack. The small steel hooks I use for this are surprisingly pointy, and easily poked through a cotton knit fabric. Do you see where I’m going with this?
You can refinish the stretchy, uneven, cut off edges of your shirts with just a crochet hook and a ball of string.
For this project you will need:
- a t shirt and scissors sharp enough to cut it
- a crochet hook, around 1.5 or 2mm. You may need to try a few to find the size and shape that works best for you.
- #10 crochet cotton. I’ve also used #3 and gotten results with a lovely soft, thick feel, but making the base row was hard work. You could also try sock or baby yarn.
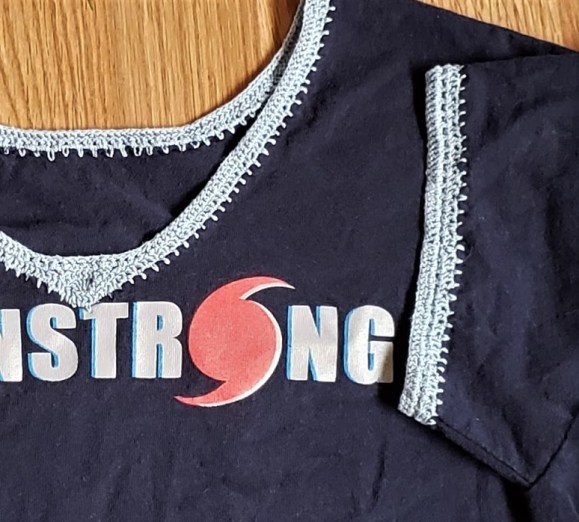
The first step is to cut the neckband off the shirt, along with any other hems you’d like to replace. Keep in mind that the finished neckline will be the rough edge plus the width of the crochet collar you’re about to add. I don’t usually measure but try to keep it symmetrical:
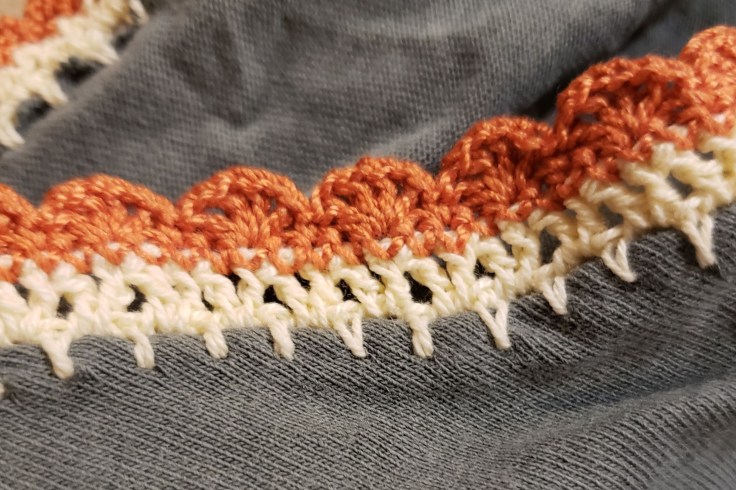
Now you need to form the base row for your crochet trim. If you’ve cut the neck off very close to the collar, keep in mind that the shirt will need to stretch a little to get over your head, so don’t work too tightly. Feel free to add more chain stitches between single crochets in the base row if this is a concern. Starting at the back of the neck, poke your hook through the fabric from front to back, ¼” to ⅜” from the edge. For the neatest results, try to avoid breaking any threads in the fabric. If you’re having trouble getting through the fabric, try another hook. Even the same size by a different brand might have a different shape that works better for you. Remember that you can also switch to a larger hook after your base row. Grab your thread with the hook and pull a loop through to the front of the fabric. Yarn over, CH3, and *poke through again from front to back, ¼” to ⅜” to the left of the first. Pull up a loop, SC, CH2, and repeat from * all the way around the cut edge. Occasionally you’ll need to cross a seam with your base row. Just go right over it however you find easiest. It may look a little lumpy but it will blend in all right as you build rows over it. Join ends when you’ve gone all the way around.


Congratulations! You’re done with the hard part. Now you can use whatever stitches and patterns you like over this base row to build up the border. Remember to work in some decreases so your crochet will follow the curve of the neckline and lay flat when you wear it instead of standing up straight and sticking out away from the shirt. I usually make up their spacing as I go along, but keep track enough so I can keep the left and right side the same.
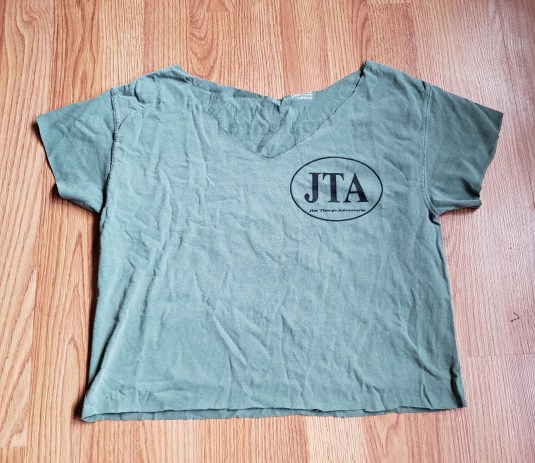
Repeat this process around the arms and the bottom, if you’ve cut those off too. Here are some other shirts I did:


This makes a great travel project and often joins me on my commute. Enjoy!

Leave a comment