
A few weeks ago I finally cracked out the plans for the Savage Industries Every Day Carry bag. I love bags, but not fancy ones. I’m looking for a bag that solves all my problems, works for almost everything, and never needs replacing. The same goes for shoes, though to my knowledge neither of these things actually exist.
I got it into my head that I wanted to try a reclaimed material for the fabric, but I didn’t have anything on hand. For a while I perused clearance tables at the fabric store instead but nothing spoke to me, so in the end I went ahead and ordered some billboard vinyl from Billboard Vinyls, which offers smaller sized used tarps. I had only resisted because they’re heavy, and thus a little pricey to ship relatively speaking.
The plans are not a sewing pattern. They’re printed on heavy paper and instead of precise step-by-step instructions offer just a brief order of operations. However this is enough to save you from the common pitfall of leaving the details to the end. The temptation for me when sewing is always to Do The Big Parts First, but if you want to come out with a nicely finished item you really need to think ahead. Luckily I followed the suggested procedure, making and attaching all the details and fittings to their correct bag and lining parts before sewing any of the larger pieces together. I found that while the vinyl was easy to cut and sew, the fact that you are making a permanent hole with every stitch meant that there was a very limited capacity for do-overs. If I was to use this material again, I would buy a much bigger piece, just to have plenty of extra.

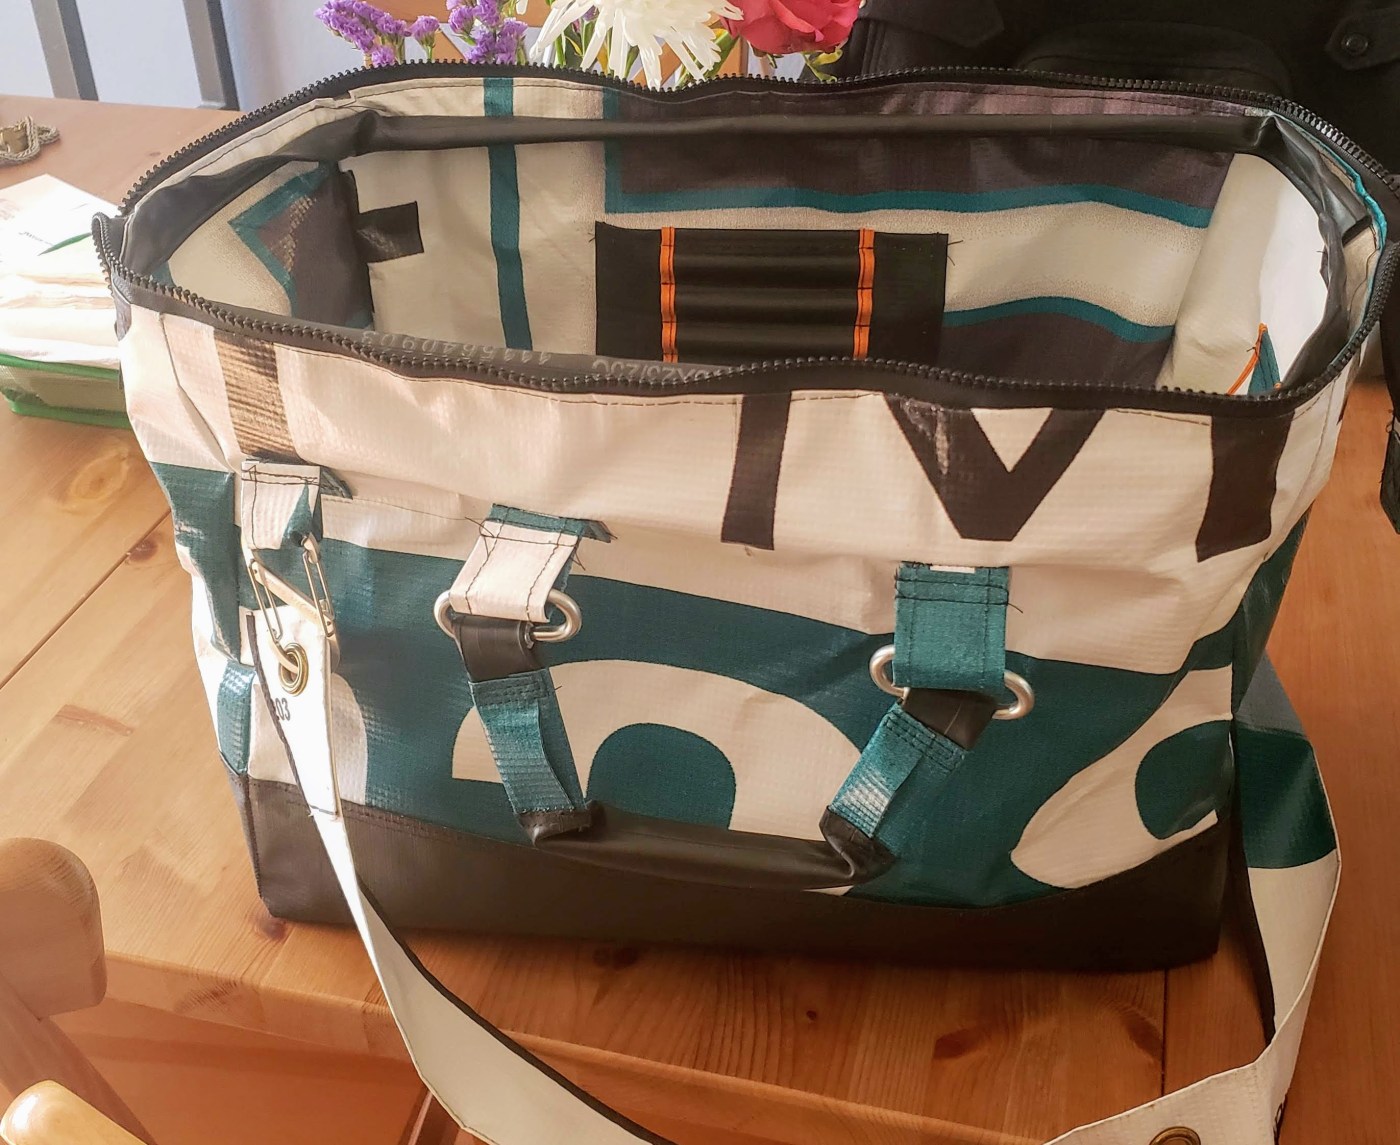
I chose to finish a few naked edges of vinyl that I didn’t want to fold under with some orange seam binding from my supply hoard, and used a couple of grommets from the tarp to make little tabs for inside the bag to hold keys or other small-but-important items. I love this feature when I find it in a purchased handbag. I also put some velcro in the bottom, similar to in the original, because I REALLY like the idea of having things stay where I put them in there. The velcro I bought was the kind with an adhesive backing, so I can put it right on the manufactured pouches I already use to organize my purse. Of course long term it will stay better stitched, so I went ahead and sewed it down anyway on my EDC ONE. The adhesive made it really easy to sew on straight.

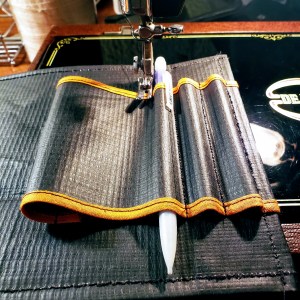
As you can see there appears to be an old 700c bicycle inner tube running around the interior of the bag, because that’s what I used as a casing for the structural pieces that hold the opening of the bag out straight. This was actually my worst material choice. It looks great but it was so hard to sew because the rubber wanted to stick to the sewing machine foot instead of sliding through! A little scotch tape helped, but what with the limited capacity for do-overs, it was too harrowing to sew it down on two edges, as I couldn’t imagine it would lay flat. And so the casing stands out, away from the bag’s lining, showing off its texture and generally looking cool, in my opinion. The supports inside (two plastic rods about 15″ long) are cut-up plastic coat hangers.
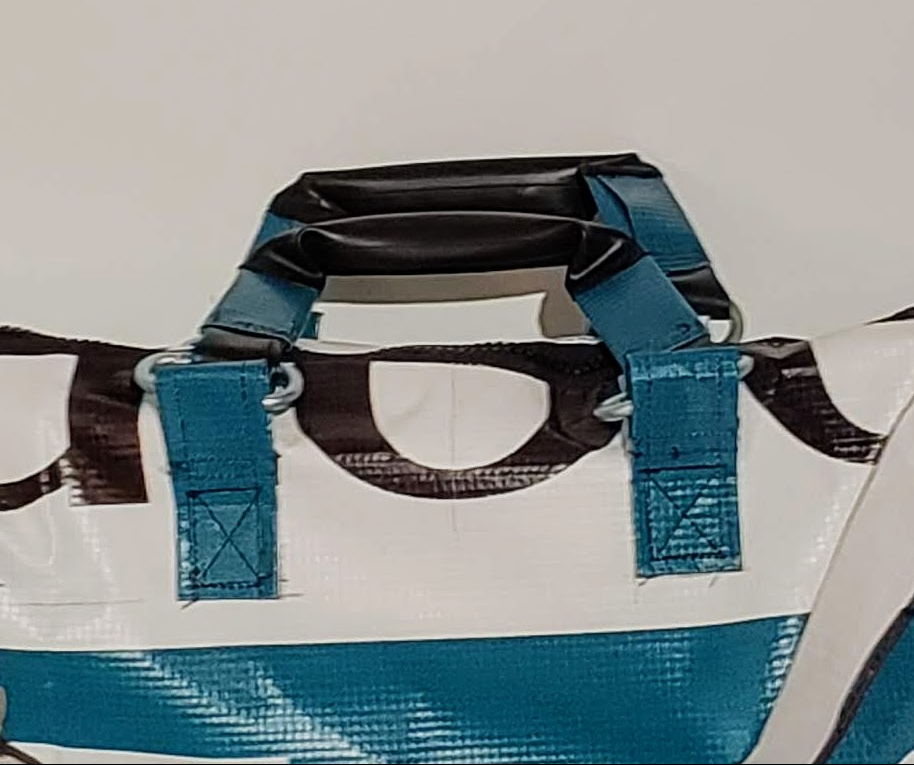
Smaller bits of those coat hangers and that inner tube went into the handles. Instead of the D-rings the plan specified for connection, I got some quick links from the hardware store to fit in with my Scavenged Light Industry theme. They’re a little heavy but the rest of the bag is both stiff and light, so they work out well. I used a piece of $5-a-square foam floor mat to make the bottom instead of sheet plastic, because I couldn’t find cheap enough sheet plastic in the brick and mortar stores and didn’t want to order it. Though now I think I could have sewn 3 layers of vinyl together and used that, which is another reason I wish I’d ordered more. But my only real complaint about my finished product is the zipper. Getting a nice straight line without unpicking it and doing it again, through the lining, and the zipper, and the outside, with everything else fully assembled, on my vintage discount sewing machine with its original motor? It came out pretty damn good, but the zipper is just a little fussy. I’m trying to be okay with it. If anything, that’s motivation for refurbishment of my Singer 95-1! The machine is good but the table needs a lot of work. If anyone reading this makes laminate countertops, let me know.


Leave a comment